From pixel to stitch
What is it about
What's kitscher than the kitschest pixel art? Stitched pixel art! In this guide, we're describing the different steps to embroider your favorite pixel art in cross-stitch and needlepoint.
How to choose your image and your material
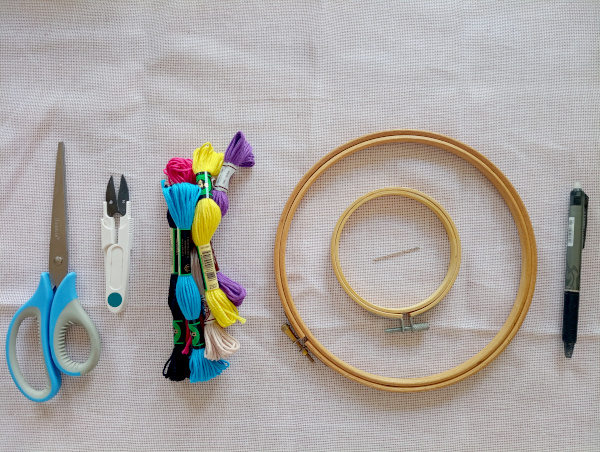
All you'll need for your project are an image model, canvas, floss, a needle and a pair of scissors. You can also use an embroidery hoop if you want to be fancy :) (it will help keeping your canvas stretched to prevent knots).
Choosing your image: There are no real restrictions, and choosing the correct image will only depend on the time you want to spend on your embroidery. Pixel art is the best for this technique for it's already made of different distinct squares. You can also use digital or traditional illustrations, but try to choose one with a good image definition, to avoid blurry or indistinct patterns. The number of colors is adjustable and will depend on the money you want to spend on the different skeins of floss you will need. Keep in mind that some very detailed images won't be very legible with fewer colors. StitchFiddle, the software you'll use to convert your image in a pattern, will help you reduce the number of colors in the image if needed. Once the image is uploaded, the pattern overview will help you figure out if your picture will be readable once embroidered.
Choosing your canvas: To choose the right fabric, you need to know if you want to cross-stitch or to needlepoint. Usually, needlepoint will be faster and cross-stitch will be more precise. Needlepoint basic stitch is a half-cross stitch on a larger grid than traditional cross-stitch embroidery, and is made on aida fabric. You can go to the very complete wikiHow to learn more about needlepoint and cross-stitch, or ask for advice when you'll go to the craft store.
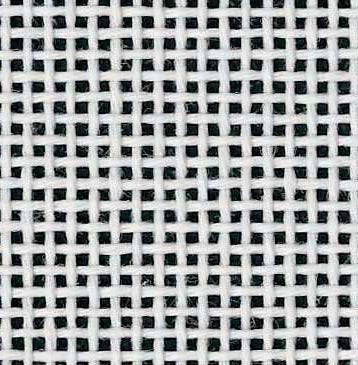
Some needlepoint fabric
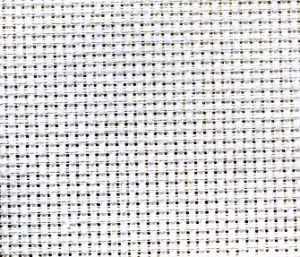
Some cross-stitch fabric
Choosing your threads: Depending on your technique, the type of floss can change. For exemple, if you use DMC threads, it's usually Mouliné for cross-stitch and Retors Mat for needlepoint tapestry.
How to use Stitchfiddle
StitchFiddle is an online software that will allow you to convert your picture into an embroidery pattern. You can do so without an account, but if you want to download or edit your chart, you'll have to create a free account (other options are available with a paid account, but a free account is far enough for what we'll want to do here).
First, click on Create new chart.
StitchFiddle will then ask you to choose your craft. Whether you chose to use needlepoint or cross stitch, check the Cross stitch box.
You can then choose the brand of floss you'll be using. It doesn't really matter which one you choose, it will only allow StitchFiddle to list the exact references of the colors you'll need. You can also check No Preference.
The How to start box will ask you if you'd rather start a chart from scratch or from an image. Here, we will use an image and check From picture. You can then drag and drop your image in the dedicated box.
After that, you can play with the options in the left panel. You can edit the size of your chart, and the number of colors you want to use. Once you're ready, if you create an account, you can either save your chart online or download it.
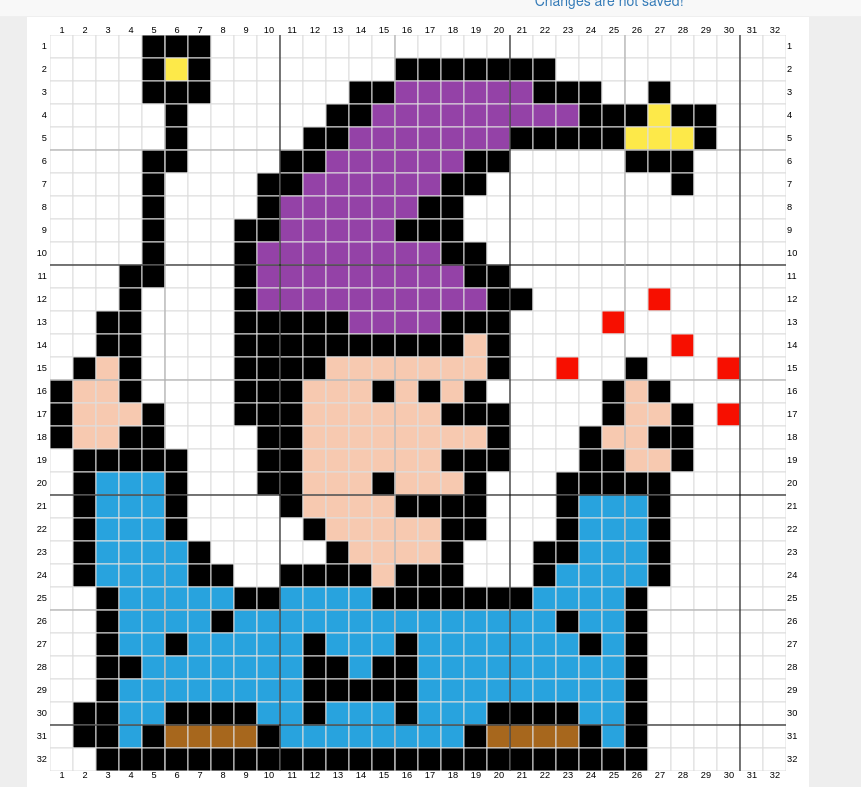

Patterns generated after Melonland's emojis
How to embroider your image
Find the length of thread that feels nice for you. Too much floss on your needle can lead to knots and breaks. Not enough will make you lose time by stopping you in the middle of your work. Usually, it's said that the best practice is to cut approximately 50cm of thread each time. But don't hesitate to experiment and see for yourself :)
Both needlepoint and cross stitch are pretty straightforward and you'll soon get the hang of it! The only fiddly thing is to keep the back of your work as clean as possible: too much threads hanging loose behind your fabric can lead to annoying knots.
Whether you choose needlepoint or cross stitch, remember to be consistent in the orientation of your stitches, or in the order in which you stitch the two branches of the 'X' of your cross-stitch!
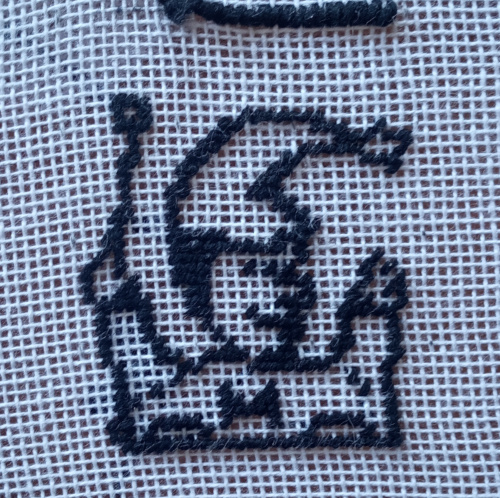
If your image has an outline, you can start by stitching it to avoid mistakes more easily.
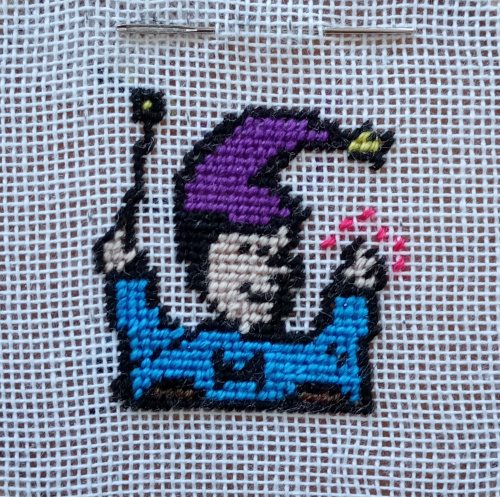
A supercute needlepointed magician!
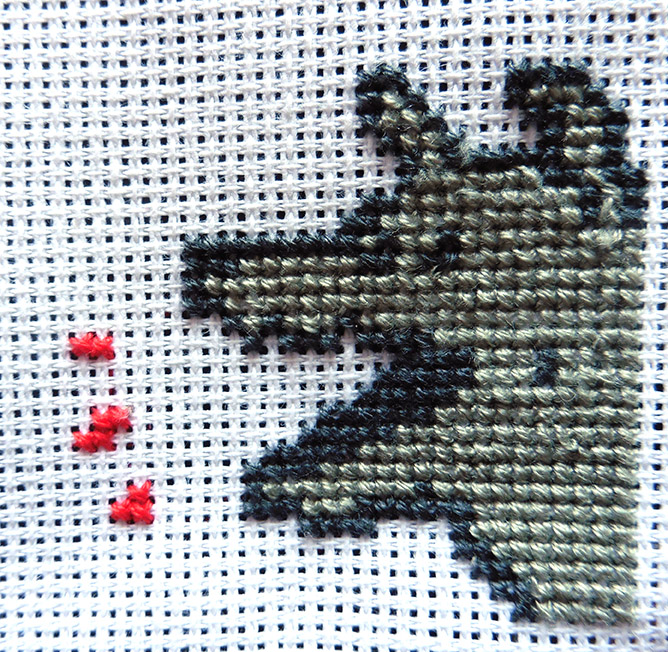
An adorable cross stitched dog!
And many more to come !
Sharing
If this guide has inspired you, we would be very happy to see your creations! Feel free to send them to us via MP, P_quod or PrincessMouche. Maybe we'll set up a little online gallery to showcase them!
Ressources
Some great links to find inspiration: